It’s September! It’s Twilight season… it’s pumpkin spice season… it’s normal pumpkin season and that’s why for this first fall post I’ll be explaining how to knit a simple pumpkin.
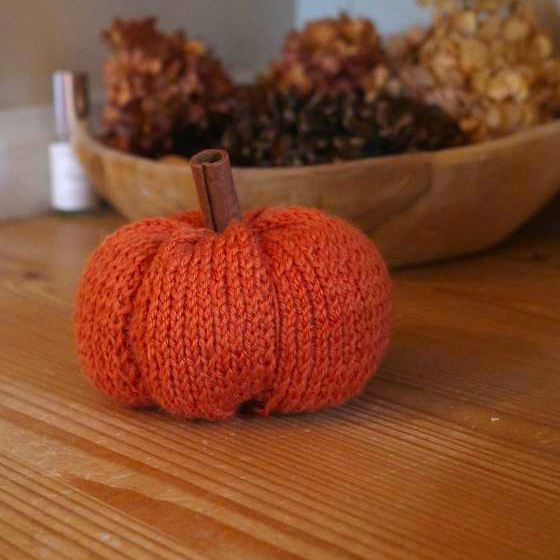
I’m going to explain this in some significant detail in the hopes that if my darling friend Emily wishes to follow this tutorial she may do so (I love u babe ❤️)
So welcome to a beginners guide on how to knit a cute little fall pumpkin.
Getting Started
My finished pumpkin measured about 9cm high by 10cm wide (including the cinnamon stick) and was made on 4mm needles (US 6) using appropriate yarn (any will do as long as it says it’s for you needle size).
My pumpkin had 6 ‘sections’ or ‘ribs’ (I don’t know what you call them but you can imagine what I mean?)
I also used [polyester soft toy filling from hobbycraft (£4.50 or 2 for £8) for which a bag should last you a while (I’ve stuffed 4 small knitted cats, a sewn bear, and this pumpkin and barely used any)
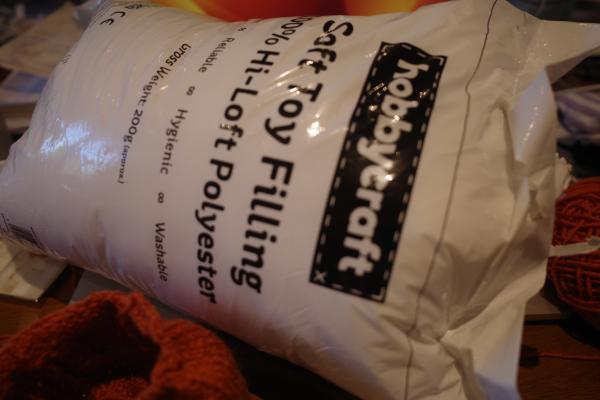
However for your filling you can use scrap spare yarn, cut up fabric, or any other sort of stuffing you can find. Personally I’m using fibre fill because I work with stuffing a lot and it produces a pleasing shape but I would understand if you didn’t want to purchase a bag of stuffing for this small pumpkin.
I also used a small wooden button from Sostrene Grene, but any button should do– it will just hold the bottom of the pumpkin in place.
Lastly you’ll need a darning needle (I recommend the ones linked) which is just a dull (blunt) needle with a large eye for sewing knitted pieces. Potentially you’ll want a needle threader like this one. They break easily when working with yarns so be careful!– but they will make threading your needle a lot easier :)
This pattern will be knitted flat which mean’s on straight needles (the normal sort), compared to circular ones as this will make the knitting easier and just as seamless.
Don’t worry about understanding knitting codes my dear because I will explain everything 🥰
However I will, just to help, explain a couple. Now not to get ahead of ourselves but a knit stitch (which you’ll read more about in the next section) is often denoted with a K– so K2 would imply knit 2 stitches. P denotes a purl stitch (again described in the next section).
Casting on is how you start a work, and there’s many cast on types to learn (two types are mentioned in the next section– with tutorial videos provided)
The Pattern
Casting on
On to my 4.0mm needles I cast on 73 stitches using the longtail cast on. This is simply my preferred cast on and any method will do– just get 73 stitches cast on and all is good. When casting on leave about 10-15cm of yarn as a tail that we can use later.
If you’re interested in the longtail cast on this is the tutorial I always recommend.
The simplest cast on though an be seen here and is the first thing you learn when knitting.
The reason I cast on 73 stitches is that each rib of the pumpkin has 11 stitches + 1 dividing stitch (don’t worry I’ll explain) and there’s 6 sections (12 x 6 = 72) and 1 extra stitch for sewing the pumpkin into a tube.
I hope you’re still with me my darling– to recap all we’ve done so far is cast on 73 stitches.
The finished pumpkin will have a stockinette appearance so you will need to know 2 stitches for this pattern– a knit stitch and a purl stitch.
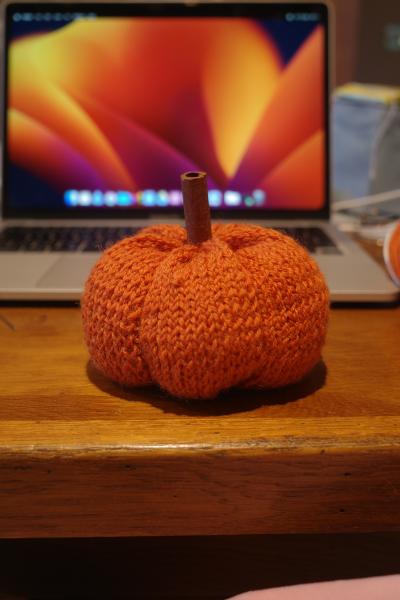
Here you can see the stockinette effect that our finished pumpkin will have when finished :)
Now you’ve cast on you’ve done the hard bit ✨ (I’m just being encouraging there is a bit more to do)
Knitting!!!
In the end your flat pumpkin will look like this:
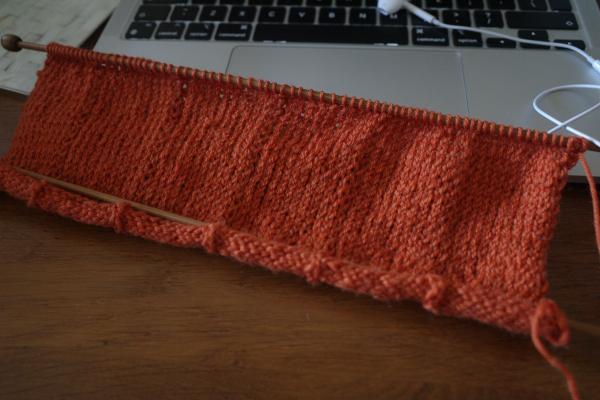
Can you see the 5 lines down the pumpkin?
These will form the markers for where the ribs will go and won’t be seen on the finished pumpkin. In order to create these I’ve placed some stitches in the pattern that will stand out to form this line.
Can you see the appearance of the fabric?
This is what the wrong side of a stockinette stitch looks like, can you see it’s identical to a garter stitch– but don’t get these confused! The other side of a stockinette stitch has pleasing V shapes as seen Here
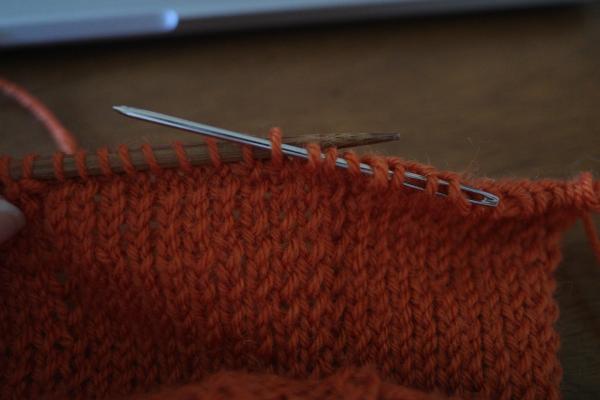
On this first row you’ll knit the first stitch (this will be part of the seam when the flat pumpkin is sewn into a tube), so there’s 72 stitches left to knit, then you’ll repeat this pattern: purl (P) 11, knit (K) 1 (the 1 knitted stitch every 12 will form this line down the pattern that I mentioned). Once this pattern of P11, K1 is repeated 6 times all 72 remaining stitches will be used up. Your last stitch should be a knit stitch as the P11, K1 pattern should fit exactly into the remaining 72 stitches as 72 is divisible by 12.
For the next (2nd) row you’ll do the inverse of this pattern, by purling the first stitch, and then knitting 11, purling 1, knitting 11, purling 1… etc… until the row is finished.
We’re doing this because we’re creating the stockinette fabric as described above (which is essentially made of knitting all even rows and purling all o14 rows)
These 2 rows (K1, P11, K1 6 times and P1, K11, P1 6 times) need to be repeated until your work is about 12cm long, and once done you’re basically 90% finished ☺️. You’ve got this and I can’t wait for you to have your finished pumpkin ❤️
Finishing
Okay I admit I titled this section ‘finishing’ but you’re staring at a flat piece of knitting with no resemblance to a pumpkin- but don’t worry because we’re actually almost there
This is going to sound a little scary, but and here me out, you need to break your yarn with about say 10cm extra as a tail. Your yarn ball is now detached from the knitting. You can just break yarn with your hand as I oft do but I recommend any scissor as I sometimes get friction burns from this habit.
You can now measure about 20cm of yarn and break that off from the yarn ball and thread it onto your darning needle, and with this you need to transfer the stitches from your knitting needle onto your darning needle with thread attached.

I must apologise for not taking a good picture but essentially you’ll have all your stitches on a long piece of yarn, from which you can then remove the needle and tie the thread in a loop to prevent any stitches falling off as you work.
Luckily that’s the stressful bit complete…
Sewing together
Now fold your work right sides together (the right side is the side with all the V shapes as opposed to the U shapes. Here’s a link to identify the right side for your work)
Thread your cast on tail (that we crated at the beginning when casting on) onto your darning needle and create a vertical mattress stitch along the rough ends of the work to produce a tube.
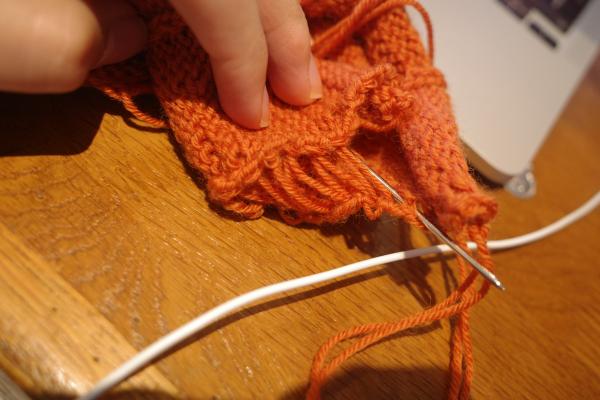
Whilst I will eventually produce a tutorial for all these techniques, here is the best explanation of a vertical mattress stitch for beginners. Note in this tutorial she doesn’t place her right sides together so you could ignore my previous instruction to fold right sides together if using this as a guide.
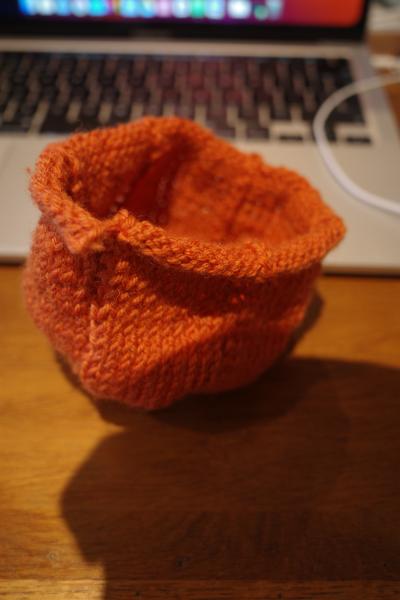
Now you can turn your tube so that the right side is facing outwards as so
Bottom & Stuffing
Remember the stitches just sitting on that piece of yarn you tied? Well now you’re going to carefully untie the ends and lightly pull so that the bottom of the pumpkin bunches in together. There might be a small hole – as long as it’s small enough the stuffing doesn’t fall out were okay. Tie the yarn together and stuff it inside the pumpkin so that it’s all neat.
You’ll also have a yarn tail from when you finished working– tie this in so it doesn’t come loose and unravel your project!
The yarn tail from the mattress seaming can be stuffed inside the pumpkin and ignored (but I like to do a little extra just for security– I just a14 a few back stitches)
You can trim any of these loose yarn tails but don’t trim them too much! 5cm is okay to neaten up your project– since you’re hiding them inside the pumpkin they won’t be seen anyway ✨

Now you can stuff your pumpkin to a firmness that feels good for you (but do remember we’ll be a14ing the rib sections which will pull it in a little so try not to stuff it too full)
Top
In order to produce the spheroid shape we’re looking for in a pumpkin we need to sew up the top so that’s what we’ll be doing now.
Take your darning needle and a length of yarn (15cm should do) and on the top row sew between every second stitch like this;
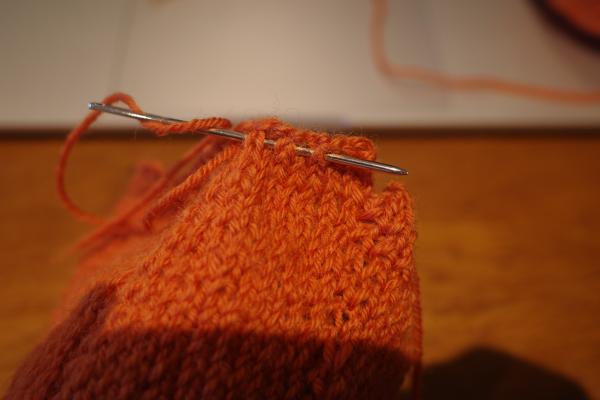
You can see I’m going under every second V shape just below the cast on edge (the horizontal V shapes you can see is the cast on edge of the work). Keep going until you get back to the point you started sewing.
Remember to keep hold of the loose end so you can pull on it in the next step!
Okay sweetie this is the most pleasing bit–
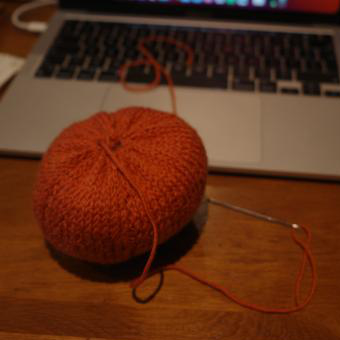
Pull on the two ends (gently!) to bring the top of the pumpkin in and form a ball shape and tie with a double knot. As with the bottom don’t worry about leaving a small hole, we’ll need this later to stick a cinnamon stick through 🥰
If you have long lengths of yarn left trim these down to about 5cm from your knot and stuff inside the pumpkin.
Ribs
Firstly let me say ✨congratulations✨– because you really are almost done now 🫶
What you want to do now is to find the lines in the pumpkin that we a14ed (they’ll be slightly hi14en but theres 6 of them)
Place the button on the bottom of the pumpkin (either side will do– it’s identical at the moment)
You need to take a length of yarn (in length it needs to fit around your pumpkin about 8 times) which you’ll then (using your darning needle) thread up through the bottom hole, through the button, pull it through the stuffing, and out of the top hole.
Wrap this around the outside following the line of one of your rib markers, and back through the bottom hole and pull slightly tight so the rib becomes defined. Come back through the button hole (if your button has small holes just try your best and if needed don’t go through the button every time) and out of the top hole, where you’ll repeat with the opposite rib (this makes it more even). Keep doing this until all 6 ribs are formed and you’re happy with the shape of your pumpkin.

Pull on the two ends and double knot them.
Stick a cinnamon stick in the top of the pumpkin (the side without the button in) and you’re done. Actually.
✨congratulations darling✨ and well done on your first knitted pumpkin! I hope I explained everything clearly– if you have any questions feel free to email me ❤️ (you can find my email on my website)
Tagged #knitting.